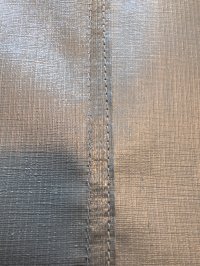
Success! We have managed to replace our awning on our 2016 Cali with fabric from the shop. I have collated the tips from this thread into 1 place, but feel free to add or amend it as necessary. I will also send a copy to Shayne in the shop.
Tips:
Take a photo at each stage to help with re-assembling
If the supporting struts keep interfering with the stability , tie a rope between the “elbows”
With a permanent pen, mark the position of the fabric on the aluminium rail, so the new fabric can be positioned correctly
Some bolts can be very tight - a ratchet spanner may be helpful
To Remove Awning from Van:
It is possible to keep the awning on the van if space is limited
2 people are needed as the awning is heavy
Unwind the awning. Remove the 2 bolts that attach it to the van. Lift the whole housing UP. Mark the position of the bolts to help with replacement.
To replace fabric
1. Remove the black plastic end cap from main housing on the opposite end to winder handle (1 screw)
2. Remove the cream coloured plastic moulding (3 x screws). Notice the 2 black “washers” on each side of the moulding which the square aluminium rod goes through.
3. Remove the 2 black plastic end caps from the corresponding end of the wind-out rail (2 screws).
4. Remove 2 x small screws on the wind out rail which retain the fabric (having marked the position of the material)
5. Slide the awning out of the housing. On the van side of the awning the aluminium tube comes out with the fabric.
6. Remove 2 x small screws on the aluminium tube which retain the fabric, having marked the position of the material with a permanent pen
7. Remove the fabric from the aluminium tube.
8. Slide the new fabric into the Kador channel on the aluminium tube
9. Replace the 2 x small screws to secure the fabric to the aluminium tube.
10. Start to slide the replacement fabric into the Kador channel in the wind-out rail
11. Slide the aluminium tube back into the awning, and the front edge of fabric into Kador channel in the wind-out rail at the same time
12. Locate the square end of the aluminium tube rod into the corresponding square hole at the winder end of the tube (This can be tricky, and you may need to remove the black plastic end cap at the winder end to see what you are doing). A small rope wound twice round the roller may help to lift and turn it. This is a 2 person job.
13. Replace the cream coloured plastic moulding on the aluminium tube (3 screws) with the “washers” in the correct place.
14. Replace the 2 x small screws to secure the fabric on the wind-out rail in the correct position
15. Replace the black plastic end caps.
16. Put the awning back on the van.
We thought we had put the fabric on the aluminium tube in the wrong way, as it refused to wind in, but it was fine when we wound it the opposite way.